Table of Contents
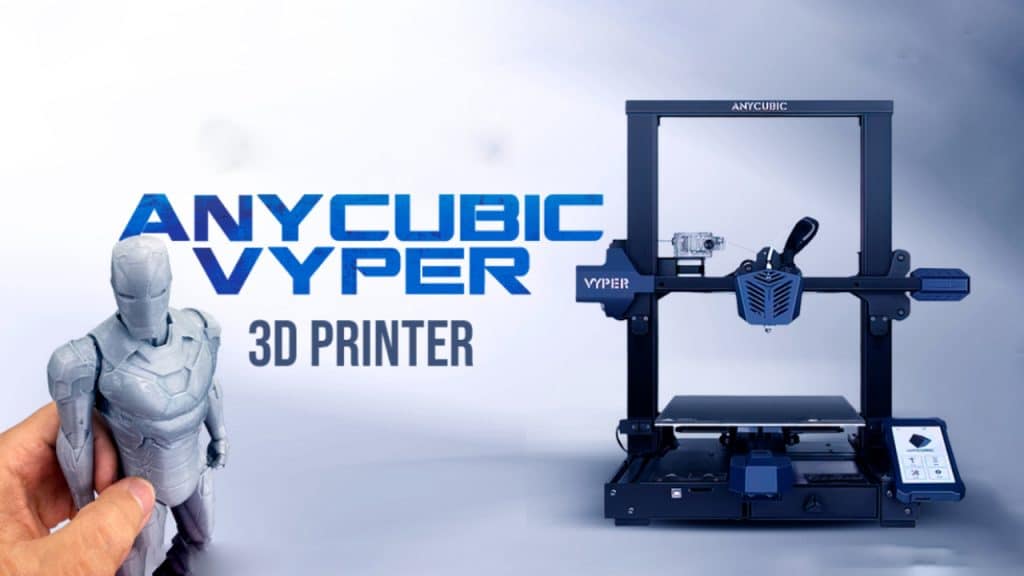
The Anycubic Vyper has a long list of features, and it seems to grow longer every time we look at it. The Vyper is a workhorse machine with a large build volume and supporting features to make printing as simple as possible, built to compete with the best 3D printers. The Vyper is appealing to users looking for a dependable machine, but not necessarily to users looking for their very first machine, with a retail price of $359 (and a presale price of $299 for the first 3000 buyers at launch).
The Vyper’s 32-bit board has silent stepper drivers, so the printer’s only audible noise comes from the cooling fans fixed to the hot end. The high-volume airflow of these fans allows the printer to deposit and subsequently cool material more quickly than competing 3D printers like the Creality Ender 3 Pro. The dual-gear extruder offers a reliable drive system and lessens the likelihood of filament slipping or stripping out overall.
PROS
- Easily removable metal print bed
- Excellent auto-bed leveling
- Strong dual-gear filament feed
- Volcano style hot end with E3D nozzle compatibility
- Simple assembly
CONS
- Missed opportunity without a wide-bore nozzle for the Volcano hot end
- Coating on the bed is not durable
- The rough texture on the bed swallows the first layer of detail
Anycubic Vyper ReviewAssembly and Unpacking

The Anycubic Vyper doesn’t require soldering or intricate mechanical assembly to put together; it ships in a semi-assembled state. The extruder gantry or build platform is secured to the base and X/Z gantry with zip ties at various locations to prevent movement during shipping. The Vyper comes with the base, gantry, LCD touchscreen, SD card, and USB SD card reader, power and USB cables, printed assembly instructions, two extra nozzles, and a complete set of Allen keys for assembling the device.
The Vyper offers a beginner-friendly experience requiring only 7 bolts and a few electrical connections to get up and running, in contrast to a DIY DIY 3D printer like the Creality Ender 3 Pro, which requires you to build a 3D printer from a box full of parts. This is best for users with little to no mechanical expertise or more experienced users who don’t mind spending a little more money on a printer that is easier to set up and use.
The process of fully assembling the Vyper can be divided into two steps: mechanical assembly and electrical assembly. It took me about 30 minutes. I only needed to remove the zip ties holding the gantries and tighten the supplied M5x45 bolts to finish the printer frame’s mechanical assembly. The Z motors needed to be connected, and the gantry for the X motor needed to have a latching connector run to it. You shouldn’t have any issues because all the wires have been terminated and marked.
Anycubic Vyper Review
Design
The Anycubic Vyper 3D printer stands out from the crowd thanks to its side-mounted spool holder and sizable plastic cover. The Creality CR-6 SE, a printer with a similarly distinctive appearance, has a similar side-mounted spool and strain-gauge automatic bed leveling system. The Vyper’s overall construction quality impressed me, and the injection-molded motion-caused motion components feel like they were made of premium plastic.
The Neptune 2’s aluminum extrusions have a smooth, matte black finish and V-slots for the side rollers. The front-facing surfaces of the frame are unslotted, which gives the machine a very tidy and expert appearance. It can be unprofessional in a professional setting for the typical 2020-style aluminum extrusions used for 3D printer frames to resemble a high school robotics project.
The dual-geared extruder system is enclosed by the clear housing mounted to the Vyper. With an adjustable level of tension, the Bowden system pushes the filament from the spool to the hot end while compensating for material stripping. The Vyper’s in-line design, which sends filament through a run-out sensor and right into the extruder module, is appealing to me.
The printer will automatically halt the build process if the filament supply runs out so you can reload it. This is a crucial feature for a printer with a high print volume like the Vyper to avoid an unexpected part failure during a lengthy print.
Belt tensioners on the X and Y axes make it possible to change the belt’s tension without completely disassembling the printer. Adjustments like this are a nice touch for a printer designed to be a workhorse like the Vyper because the belts can stretch out over time.
The Vyper has an integrated drawer on the bottom of the printer that allows you to discreetly store frequently used tools (filament snips, Allen keys, etc.). I’m a big fan of this kind of tool organization because no one likes digging through drawers to find the right tool, and quick access to an Allen key or tweezers can help save a failing print. This is a clever solution that avoids over-engineering because the space under the printer is typically unused.
Two magnets are attached to the back of the drawer, and two magnets are built into the printer. Even though the magnets on my drawer were installed backward, this is a clever way to keep the drawer closed while printing. This indicates that the drawer won’t close completely and will instead actively repel itself from the back of the machine, leaving a gaping hole. Although flipping the magnets on the drawer will fix this minor problem, I was a little worried about coming across a quality control problem early in the assembly process.
Anycubic Vyper Review
User Interface

The Anycubic Vyper’s user interface is a 4.3-inch color touchscreen LCD that is mounted on the machine’s right side. Because of its location, it is accessible during printing and isn’t obscured by the printer’s moving bed. The LCD on the Vyper had a matte finish that I liked; it felt responsive and looked polished. For a 3D printer, the large 4.3-inch format and backlit LCD are surprisingly readable and easy to use (for reference, the original iPhone LCD size was only 3.5-inches.)
I always want to pause and recognize the attention to detail that went into the LCD housing, which has a geometric pattern embossed on the back. This feature’s inclusion is intended to demonstrate a higher level of intentionality in the machine’s design since, once mounted, you’ll probably never see it again.
Anycubic Vyper Review
Leveling and Calibration
With the Anycubic Vyper, there is no longer any need to manually calibrate the printer using thumbscrews and a piece of paper because the bed leveling process is automatic. There aren’t even any thumbscrews to turn because the build platform on the Vyper is fixed directly to the moving gantry. Most automatic bed leveling procedures still require operator involvement (such as the hybrid method used by the Flashforge Adventurer 3 Lite). Still, the Vyper is a one-button operation requiring no operator involvement.
The Vyper will automatically start leveling after you click the “Auto-leveling” button. The nozzle will gradually descend and make contact with the bed at each of the 16 points the Vyper uses to calculate the offsets for the build surface at any given point. The speed of the automatic bed-leveling, which only required a few minutes, impressed me. The Vyper runs the calibration as needed, and I only ran it once during the more than 70 hours of testing, in contrast to printers like the Prusa Mini+, which will run the calibration before every print. This saves time and stops the calibration from running unnecessarily, but if you wanted to run the calibration before each print, it could be easily added to the starting gcode.
Anycubic Vyper Build Platform
The Anycubic Vyper’s build platform has a magnetic base that keeps the textured, flexible spring steel sheet used as the build surface. The average thickness of this sheet is.51mm, making it extremely thin and flexible. This type of build platform makes it so simple to remove parts that it almost feels like cheating. When hot during printing, the textured surface holds parts in place; when cool, they slide off effortlessly without needing any tools. Although Prusa has been using this idea on the Mini+ and their i3 MK3S for years, Anycubic is using a concept that is not particularly well-known.
It’s difficult to overstate how much a build surface like this can improve a 3D printer user’s experience in general. A print could fail if it delaminates during printing if it doesn’t fully adhere to a surface. Although printers use a variety of strategies to combat this (thicker or slower first layers, aftermarket adhesives, etc.), the surface itself significantly impacts the printer’s performance. This textured metal surface is simple to use, doesn’t need to be removed with hand tools, and can be cleaned with isopropyl alcohol to prevent buildup.
The Anycubic Vyper Hot End
The Anycubic Vyper’s special hot end, which has some intriguing features you won’t find in many other printers, is largely responsible for its magic. The hot end cover is made to allow for the most airflow possible and uses three fans to cool the hot end’s heat break and the printed part. When printing, a cool heat break (the cylinder in the image above) will stop heat from rising up the filament, which could cause it to soften, deform, and affect the print quality.
The strain gauge, located in the tiny black metal bracket above the heat break, is the key component of the Vyper’s automatic leveling system. The strain gauge can use the force transmitted through the heat break, which measures surface deformation, to determine when the nozzle makes contact with the build surface. This is an affordable method of developing a quick and precise leveling system, and I discovered that this kind of leveling system was trustworthy and simple to use.
Printing on the Anycubic Vyper
A test print called “owl.gcode” is already preloaded onto an SD card with the Anycubic Vyper. This model’s toolpath makes it obvious that the seam alignment—where each layer begins and ends—has not been optimized, resulting in a model with thin marks scattered throughout. In the images above, you can see the difference between the preloaded model on the left and the model with the same settings on the right but with the seam optimized for appearance. With this printer, Anycubic included a spool of grey PLA under the “3D Consumables” brand, which I used for all the parts in this review.
I started this print without changing the bed leveling because the printer had already been calibrated. The printer quickly reached operating temperature and began printing a skirt around the model that stuck well to the textured build surface. As I anticipated, there was a little extra material at some of the start/stop points of each layer, as seen in the image above. Although this is not difficult to remove, a straightforward factory setting adjustment would have produced a demonstration print that was much more impressive.
The owl model was easily removed from the textured build surface after the model had been printed in 1 hour and 19 minutes and had had time to cool down. The model was sturdy and well-made, but the print had a cluttered appearance due to the small seam-related imperfections throughout the print. I appreciated how quickly this test was put together because it proved that the printer was mechanically and electrically sound without consuming a lot of resources. To give first-time users a much better first impression of the printer, I wish Anycubic had spent a little more time preparing the model.
It’s a nice touch and gives the print a slightly more uniform appearance to have the model’s bottom layer appear slightly grainy due to the textured build surface. This prevents the print from having a mirror-smooth bottom layer, which makes the print look less uniform overall, similar to the textured sheet found on the Prusa Mini+.
Anycubic Vyper Review
Slicing Software
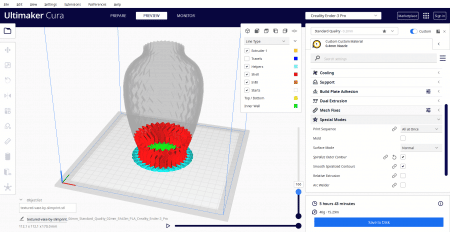
Anycubic has opted to ship the Vyper with a copy of the Ultimaker Cura slicer app and a profile they created for the Vyper rather than creating their own proprietary in-house slicer app. Instead of developing their own app from scratch, other manufacturers will occasionally create their own fork, or derivative, of the Cura slicer app. The user experience may vary depending on how simple it is for the manufacturer to set up your printer with a built-in profile, even though these apps are remarkably similar in terms of functionality and appearance overall.
The Vyper has created a unique profile specifically for the Cura slicer application and has put it on the SD card. When I looked further into the profile, I was shocked to discover that the default print speed was set to 80 mm/s. The Vyper’s speed is set much faster than the Creality Ender 3 Pro and Elegoo Neptune 2’s typical print speeds of 40 or 50 mm/s. You’ll need to spend some time fine-tuning this profile before using it because I had to make numerous small adjustments to it (it’s set to print infill before walls, which almost guarantees a poor-looking print with visible infill patterns).
Anycubic Vyper Review
Tech

GENERAL SPECIFICATIONS
- Technology: Fused deposition modeling (FDM)
- Year: 2021
- Assembly: Partially assembled
- Mechanical arrangement: Cartesian-XZ-head
- Manufacturer: Anycubic
3D PRINTER PROPERTIES
- Build volume: 245 x 245 x 260 mm
- Feeder system: Bowden
- Print head: Single nozzle
- Nozzle size: 0.4 mm
- Max. hot end temperature: 260 ℃
- Max. heated bed temperature: 110 ℃
- Print bed material: Steel
- Frame: Aluminum
- Bed leveling: Automatic
- Connectivity: microSD card, USB cable
- Print recovery: Yes
- Filament sensor: Yes
- Camera: No
MATERIALS
- Filament diameter: 1.75 mm
- Third-party filament: Yes
- Filament materials: Consumer materials (PLA, ABS, PETG, Flexibles)
SOFTWARE
- Recommended slicer: Cura, Simplify3D, Repetier-Host
- Operating system: Windows, Mac OSX, Linux
- File types: STL, OBJ, AMF
DIMENSIONS AND WEIGHT
- Frame dimensions: 508 x 457 x 516 mm
- Weight: 10 kg
Bottom Line
Overall, my experience with the Anycubic Vyper was positive, and I do not doubt that this printer will appeal to users who want to print large quantities of parts or parts for production. It is perfect for setting up a fleet of these machines quickly or just for a fun weekend project because of the sturdy build and quick setup time.


