A 3D print sticking to the bed is inconvenient. Continue reading to find out how to safely remove a 3D print from your bed!

Dealing with Persistent Adhesion Problems
You’ve fine-tuned your slicer, repaired your printer, and just finished a fantastic print, but it’s stuck on the build plate. While inadequate first layer adhesion can be a concern, excessive part adhesion to the build surface can also be a problem.
Removing a print off the build plate may be a harsh and dangerous operation, mainly when it’s stubborn and won’t move. You want to readily remove the print without damaging the item or the build plate. While this may appear simple, if there is too much first layer adhesion, as is often the case with polymers like PETG, which adhere to most surfaces quite effectively.
We’ll go over a few different methods for removing a 3D print off the build plate in this article. We’ll go over the process, what you’ll need, and how to accomplish it in each section!
Method 1: Use Harsh Force
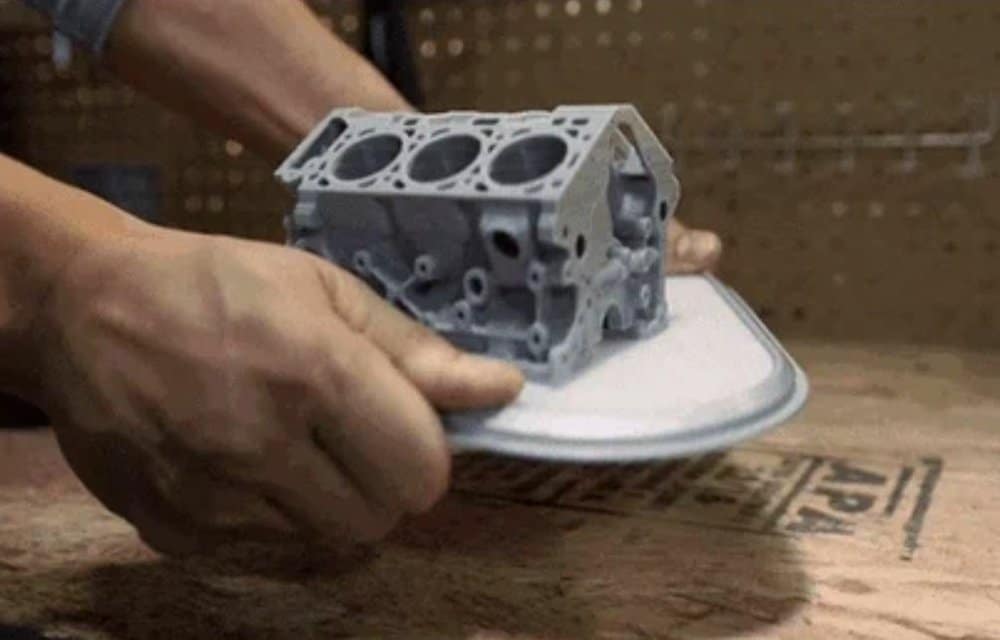
The first way is self-evident: brute force. All you need for this procedure is your hands. Hold the build plate in position with one hand while pushing or pulling the print away from the surface with the other. Be cautious when removing parts in this manner because an abrupt release from the bed could force you to smack your hand into something.
Also, you should only utilize the brute force method if your print is solid. A highly detailed print with numerous minor features is more likely to be damaged during this process, mainly if there is no smooth, simple surface to hold. If there’s a print region where the build plate and the object are separated, try prying the part off the bed with a powerful object.
Method 2: Use a Flat Blade

The second (and most famous) method of removing a part is using a flat, sharp blade, such as a spatula. This equipment might be anything from a paint scraper to a giant flathead screwdriver.
Makers also propose the following fantastic alternatives:
Spatula BuildTak
Blades made of plastic
Filing Knife Set
The most important thing to remember while using any blade is safety. If you’re not careful, it’s easy to cut yourself or have portions of the bed detach quickly. Always push the knife away from you to avoid injuring yourself. Be careful not to scratch the print surface since this will make it difficult to level your bed and may affect future print adhesion.
Method 3: Switch to a new build platform

If part removal is a significant issue for you, you might consider upgrading to a flexible construction plate. Elastic build plates are exactly what they sound like bending construction surfaces. This quality makes removing components simple: simply stretch the print, and it should pop off.
There are many possibilities for a flexible construction platform nowadays. We’ve picked a couple that we think you’ll enjoy:
BuildTak FlexPlate Adafruit flexible plate Easy-Peelzy Ziflex Prusa spring steel smooth PEI plate
When selecting a flexible build plate for your printer, double-check the size and compatibility with your machine. You don’t want to buy a thicker plate that will block an inductive sensor.
Because a flexible glass build plate isn’t available, moving to a metal or other flexible material build plate can have several advantages. For example, you can obtain a flexible bed with a textured or smooth surface, so you can experiment with different adhesive finishes to find which one best suits your printer and materials.
After you secure your new build plate to your printer, level the bed, and set the Z offset, you can begin printing. Detach the build plate after your print is finished and gently bend it until your part pops off. You might want to bend it in several different directions.
Method 4: Make a Raft Available

When preparing a model for 3D printing, our fourth technique is to enable a raft in your 3D slicer. Rafts are buffer layers between your print and the build plate that promote bed adherence. Furthermore, you won’t have to worry about destroying the raft because it will probably be discarded.
Rafts are a win-win feature since they make it easier to remove parts while also reducing the possibility of your part getting distorted. The most significant disadvantage of employing a raft is that it lengthens the printing process and consumes more filament.
Most slicers have raft parameters that can be adjusted, such as the number of top layers. After the item has been produced, you have two options: removing the part from the raft first or removing the raft from the build plate first.
It’s usually better to remove the raft from the build plate first. You can do so in almost any method as long as you’re only touching the raft to not damage any features on your actual model. You may permanently remove the raft using the other methods on this list. Still, given the raft design, it should be much easier.
Method 5: Add to the Build Platform
To separate your print from the printing surface, we can add an additional surface or buffer layer to the build plate. This method is similar to utilizing a raft. Still, it uses non-printable buffer layers between the bottom of your print and the build plate, such as tape, sheets, or glue.
There are numerous buffer layer choices, including the following:
Tape for painting
PEI peelable sheets
Sticks of regular glue
Stick or apply the buffer layer, correct your Z offset to account for the increase in build plate height, and start your print using these additives. After that, you can either remove the part of the buffer layer or the complete buffer layer. If you have glue on the plate, you can run it under water to remove the glue layer and aid the portion slip off (we’ll go through how to use water in the last section).
Method 6: Create a temperature difference with

Cooling down a print on the bed is another approach to removing it. This method will perform much better if your construction plate is made of a temperature-sensitive material like glass or aluminum. When materials cool, they contract. You can use the various cooling rates of the print bed and the printed portion to your advantage.
Allow your build plate and print to cool to room temperature, and then place the build plate (with the stuck component) in a cold environment if the problem persists. This might be your refrigerator, freezer, or a vent that blows chilly air.
Remove your print after a few minutes or until the bed has become reasonably chilly. The print should readily peel away. If it still doesn’t work, try putting the construct plate back in the freezer for a more extended period or try another approach from this list.
Method 7: Floss It Off

While floss is an unusual approach for removing a stuck part from the bed, it is highly effective. Like a saw, you’ll want to repeatedly move it back and forth. This back-and-forth action will generate friction, which will aid in the removal of your part.
Although dental floss is the most common tool for this unconventional procedure. You can also use more robust string-like materials like jewelry wire or high-gauge soldering wire.
Once you’ve got your floss or wire, loop it around the base of your print and lay it on the build plate, then quickly slide it back and forth, pushing towards you. Your part should ultimately disengage from the construction plate, probably accompanied by a pleasant aroma!
Method 8: Submerge it in cool water

All you have to do with this procedure is place your part under a constantly cool or cold water stream. This method is analogous to putting your print in the fridge because you’re intentionally generating a temperature difference between the materials.
Wait until everything is at room temperature before proceeding. Remove the construction plate and place it in a sink if the part is still stuck. If you used glue, hairspray, or another adhesive, first remove some of the adhesive ingredients with warm water (not too hot).
After that, run a few minutes of reasonably chilly or cold water over your build plate. Avoid getting the print wet if possible, as this procedure works best when only the print bed or the printed component is cooled. Another benefit is that any residual glue may be removed with running water.
You can try removing the section with your hands or a praying tool like a spatula after a few minutes. If your print still won’t budge, try another procedure or run the build plate under colder water for longer.
Method 9: Incorporate a Solvent

A solvent is our last option for removing a part from the construction plate. Remember that solvents should not be your first option because they might damage print surfaces. This is especially true if you’re working with PEI sheets, painter’s tape, or other non-absorbent materials.
Applying a solvent to the print base where it meets the bed softens the affected region, making it easier to remove the print off the bed with a prying tool. There are a few reasonable solvent solutions if you’ve exhausted all other options and need to remove a part. Two of the most popular are isopropyl alcohol (IPA) and acetone.
Apply a small amount of solvent to the connection points between the bed and the print while using it. If you use too much, you risk causing other issues, such as the degradation of your build surface.

