
Ender 3s is an excellent 3D printer for beginners but stringing may be a problem. Learn how to reduce stringing with the perfect Ender 3 retraction settings!
How to Reduce Stringing: Ender 3 Retraction Settings A Crucial Setting

Retraction, or pulling the filament back during travel, relieves pressure on the nozzle. Every 3D slicing software has retraction settings, and we’ll go over them to help you get to a “no stringing” zone with all of your Ender 3 prints, Ender 3 Pro prints, or Ender 3 V2 prints.
We’ll concentrate on Cura settings for your Ender 3. Follow along as we activate the appropriate retraction settings (under “Travel”) and go over the recommended values for each.
If you don’t see some of these options in your Cura version, go to the Material section and click the gear icon. This opens the “Setting Visibility” dialog box. Check all of the boxes, and then click “Close” to see all of the material settings under “Printer Settings.”
How to Reduce Stringing: Ender 3 Retraction Settings Enable for Additional Refining
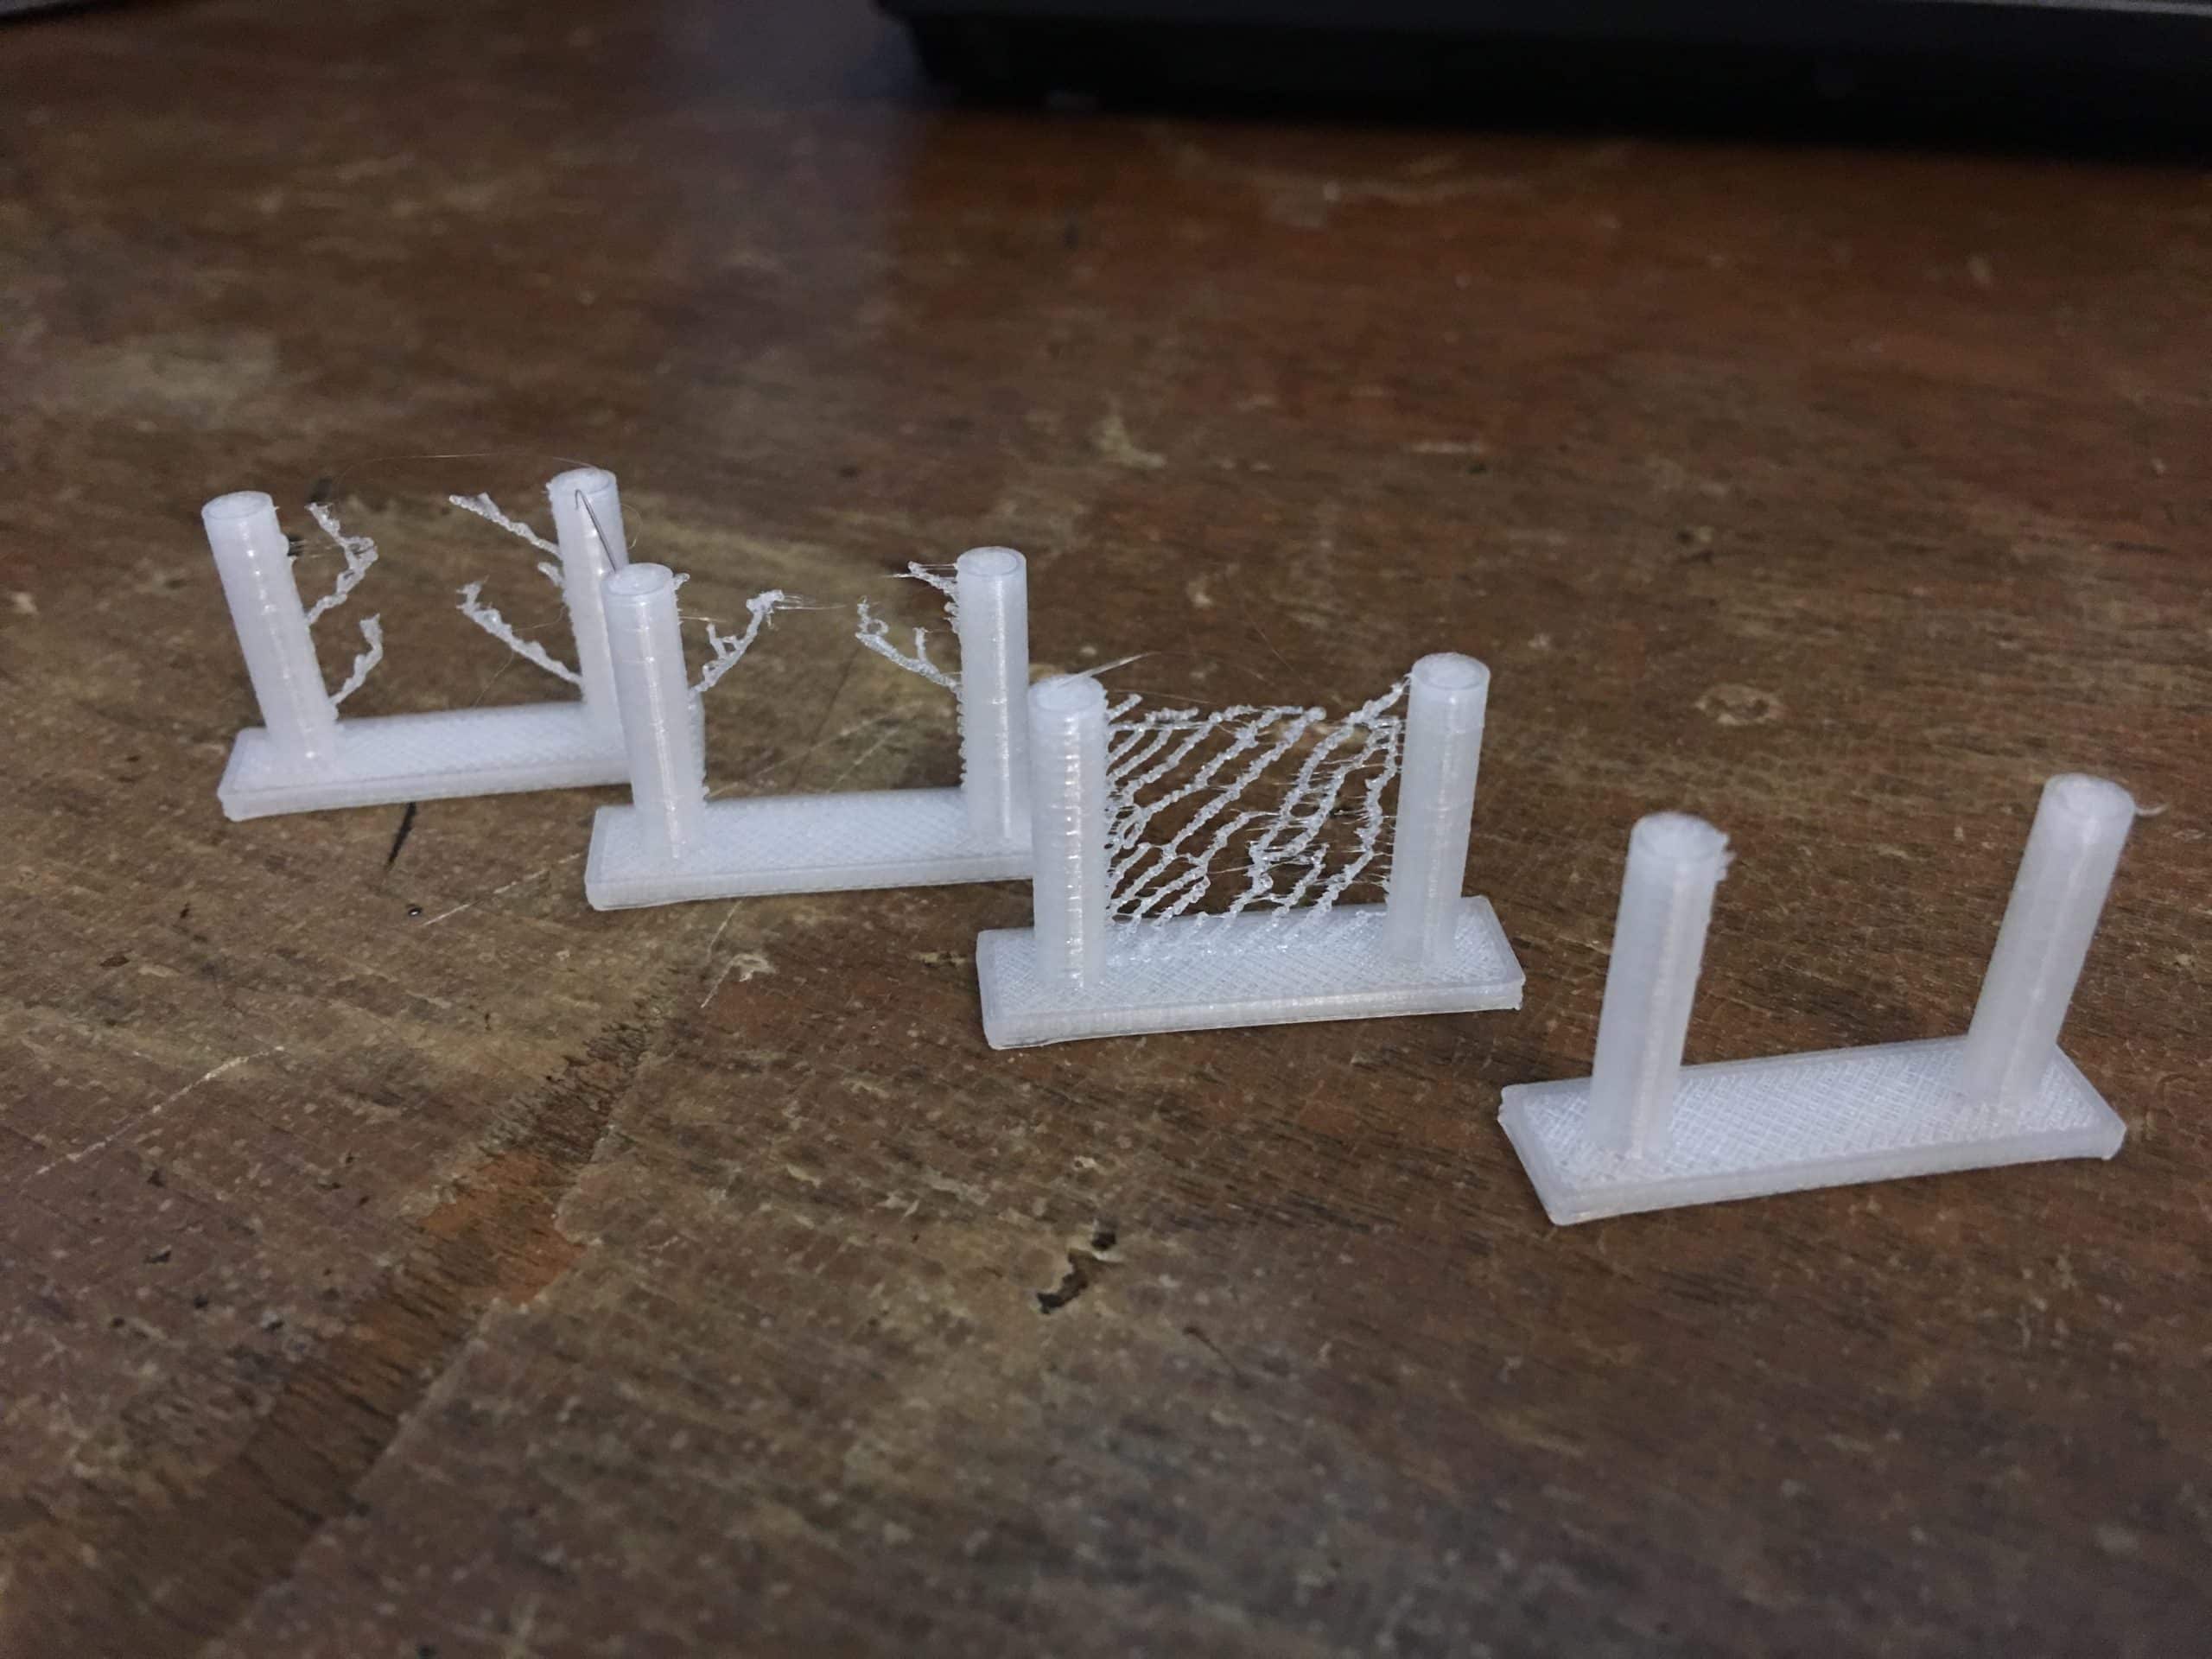
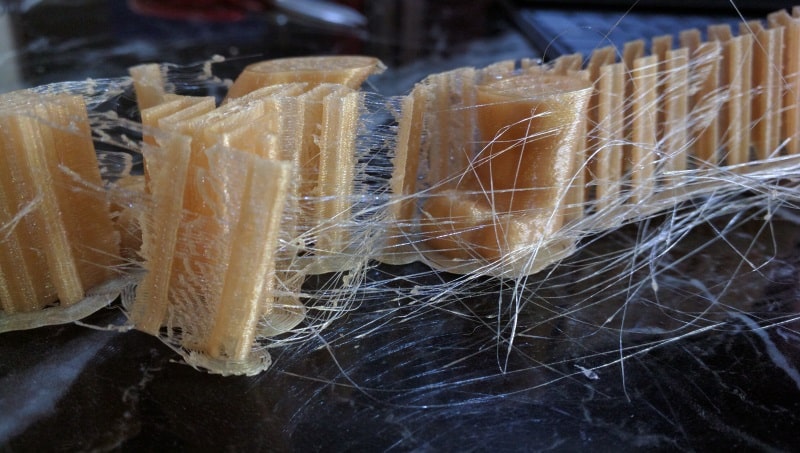
Although the Ender 3s work well right out of the box, stringing will occur if the retraction settings are not fine-tuned.
This is one of the most basic options. It is essentially the switch that activates the printer’s ability to perform retraction movements. There are no other retraction settings when it is turned off. With it turned on, you can change the settings to get the best possible print.
How to Reduce Stringing: Ender 3 Retraction Settings Retraction Distance

The amount of filament that the extruder will retract from the nozzle is referred to as the retract distance.
If this setting is set to 7 mm, the extruder will pull 7 mm of filament from the hot end. When the printer is ready to lay down more filament, it will replace the same 7 mm of filament in the hot end. This brief pressure relief can stop oozing and stringing. After retraction, push the filament back into the hot end to prepare your Ender 3 to print again. This is referred to as “priming.”
It’s best to start with a 5 mm setting and adjust it up or down by 1 mm until it’s just right. The goal is to get the lowest possible number while minimizing stringing as much as possible. 3 to 7 millimeters is a good range. A number that is too low will not reduce stringing, and a number that is too high will cause filament damage and increase print time.
The gear on the extruder is responsible for the potential filament damage. To move forward or backward, it has small teeth that dig into the filament. Moving the filament back and forth over the same area too frequently can cause damage to the filament, causing it to slip. This process is also known as filament grinding.
How to Reduce Stringing: Ender 3 Retraction Settings Retraction Speed
The speed at which the extruder pulls the filament out of the nozzle is referred to as retraction speed. This is usually expressed in millimeters per second (mm/s). The faster the movement, the higher the setting. The trade-off here is that you need to get the filament out of the nozzle as soon as possible, but the faster you go, the more potential damage you could cause to your filament.
Cura divides retraction speed into two categories:
Retraction Retract Speed is the rate at which the extruder pulls the filament out of the hot end and nozzle in millimeters per second.
Retraction Prime Speed is the rate at which the extruder pushes the filament into the hot end, priming it for the next layer of filament on your print in millimeters per second.
These two settings define speed out and speed in layman’s terms. These settings are not required to be changed; however, setting Retraction Speed will cause it to copy that speed into both of these options.
Why divide retraction speed into two parts? You may discover that your extruder causes more damage during priming than during retraction, so a slower speed here will help protect your filament.
Begin with a speed of around 50 mm/s. If you notice filament dust around your extruder, you should reduce your speed. The dust is caused by the extruder gear grinding against the filament. If you don’t see any dust, you can increase this value to speed things up a little. Your print time will be reduced if you print at a faster speed.
How to Reduce Stringing: Ender 3 Retraction Settings Extra Prime Amount

This option can assist you in compensating for material lost due to oozing. When the printer primes after retraction, it pushes the amount specified here.
The recommendation here is to work on your retraction distance until it reaches a value that prevents additional material loss and leaves this setting at 0.
How to Reduce Stringing: Ender 3 Retraction Settings Maximum Count

This option adjusts the maximum number of retractions on a specific area of filament. This option protects your filament from damage caused by excessive retracting and priming. To push and pull the filament, the extruder employs a gear with teeth that dig into it. As a result, the more times your extruder retracts on a single piece of filament, the more damage can occur.
Cura’s default setting is 100, which is far too high to protect your filament. A good starting point is ten. This is low enough to protect your filament while also being high enough that the slicer will not enforce it. If the slicer goes over this limit, it disables retraction for the length of filament specified in the following setting.
Set the Maximum Retraction Count to 10 and only adjust if you notice filament damage.
How to Reduce Stringing: Ender 3 Retraction Settings Minimum Extrusion Distance Window

In the Minimum Extrusion Distance Window, you can specify the length of filament on which the Maximum Retraction Count is enforced. Suppose you set the Maximum Retraction Count to five and the Minimum Extrusion Distance Window to ten millimeters. In that case, the extruder will only allow five retractions over a ten-millimeter piece of filament. Any subsequent retraction commands will be ignored.
Rather than attempting to calculate how many retractions you could achieve over a specific length of filament, we recommend keeping this number close to your Retraction Distance. Then work with your Maximum Retraction Count to ensure you do not damage your filament.
How to Reduce Stringing: Ender 3 Retraction Settings Supports
This is a checkbox setting. When enabled, it prevents retractions while moving within supports. Stringing will still occur, but only within the support structure.
Why would you allow stringing in your support structure? Remember that retraction is a delicate balance; retraction is beneficial, but too much will lengthen your print time and damage your filament. Don’t worry about the supports because the best use of retraction is to protect your print.
How to Reduce Stringing: Ender 3 Retraction Settings Nozzle Switching
These options are used to specify the retraction distance and speed when the nozzle enters standby mode, which is common in multi-nozzle printers. Because the Ender 3s only have one nozzle, keep the default settings of 16 mm and 20 mm/s. Cura does not like a value of 0 in either of these fields.
Combing Mode
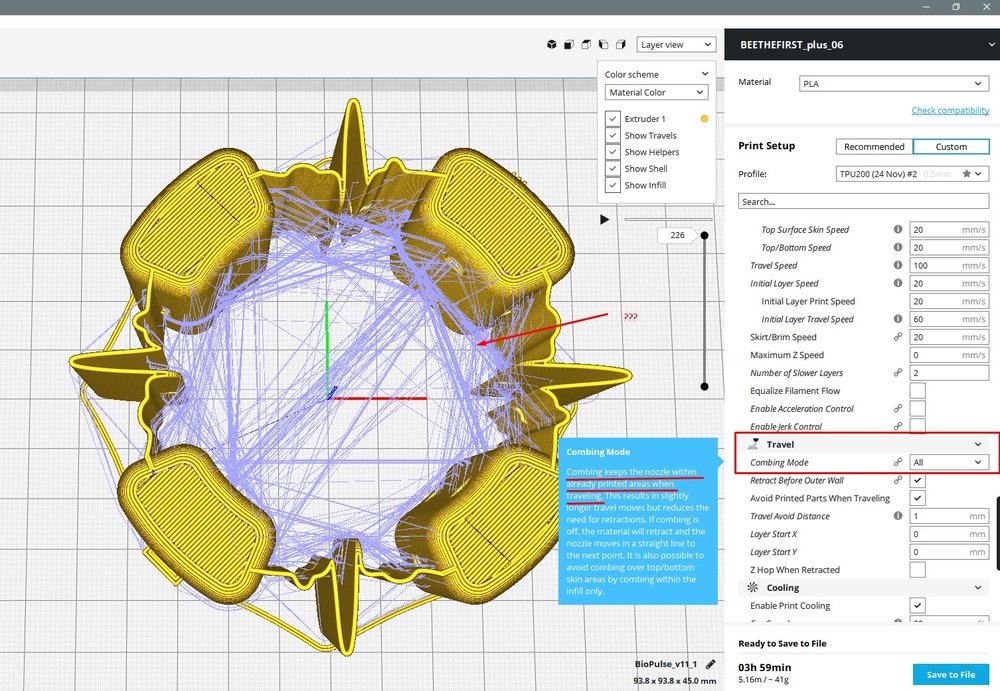
Combing mode, found in “Travel,” instructs the slicer to keep the nozzle within printed areas when moving from point to point. Combing mode has four options: Off, All, Not in Skin, and Within Infill.
Within Infill is the option we recommend. It will reduce the number of retractions you make by keeping the nozzle within the infill areas as you move from one point to another. This may lengthen your print time, but it will protect your filament.
How to Reduce Stringing: Ender 3 Retraction Settings Summary
As a final summary, here are our condensed recommendations for your Ender 3’s retraction settings:
- Enable Retraction: Yes
- Retraction Distance: Begin with 5 mm and adjust it up/down by 1 mm until all stringing is gone
- Retraction Speed: Begin with 50 mm/s and slow down if you’re seeing filament damage
- Retraction Extra Prime Amount: Leave at 0 and focus on Retraction Distance
- Maximum Retraction Count: Set to 10 and only adjust if you see filament damage
- Minimum Extrusion Distance Window: Set to your Retraction Distance
- Limit Support Retractions: Yes
- Nozzle Switch Retraction Distance: 16 mm
- Nozzle Switch Retraction Speed: 20 mm/s
- Combing Mode: Yes, Within Infill


