
Introduction
3D printing, a marvel of modern technology, has brought the power of creation to our fingertips. From prototypes to intricate art pieces, the possibilities are boundless. However, like any other technology, it comes with challenges, one of which is the common but often overlooked issue known as the “elephant foot.” This defect, although small, can significantly impact the aesthetics and sometimes the functionality of the printed object. Despite its prevalence among 3D printing enthusiasts, it remains an under-discussed topic.
Key Takeaway Table
| Problem | Causes | Solutions |
|---|---|---|
| Elephant Foot | Weight, Over-extrusion, Poor Cooling, etc. | Bed Leveling, Temperature Adjustment, Chamfering |
Understanding the Elephant Foot

The term “elephant foot” refers to a specific defect seen in 3D printed objects where the first layer of the print flares slightly, resembling an elephant’s foot. This outward flare is not just an aesthetic issue but can also impact functionality if precise dimensions are crucial for the application of the printed piece. Several factors contribute to the elephant foot issue:
- Weight of the Object: The weight of the print can cause the first layer to spread out if it remains too soft due to inadequate cooling or high bed temperature.
- Z-offset Errors: An incorrect Z-offset can lead to over-compression of the first layer against the build plate.
- Over-extrusion: Excessive material extruded during the first layer formation can contribute to this defect.
- Poor Cooling: Inadequate cooling can prevent the first layer from solidifying quickly, leading to a flare.
- High Bed Temperature: A high bed temperature keeps the first layer soft, allowing it to spread under pressure.
These factors are the usual culprits behind the elephant foot issue, and understanding them is the first step toward fixing the problem.
Strategies to Combat Elephant Foot
Tackling the elephant foot issue requires hardware adjustments and software configurations. Here are some strategies to mitigate or eliminate this defect:
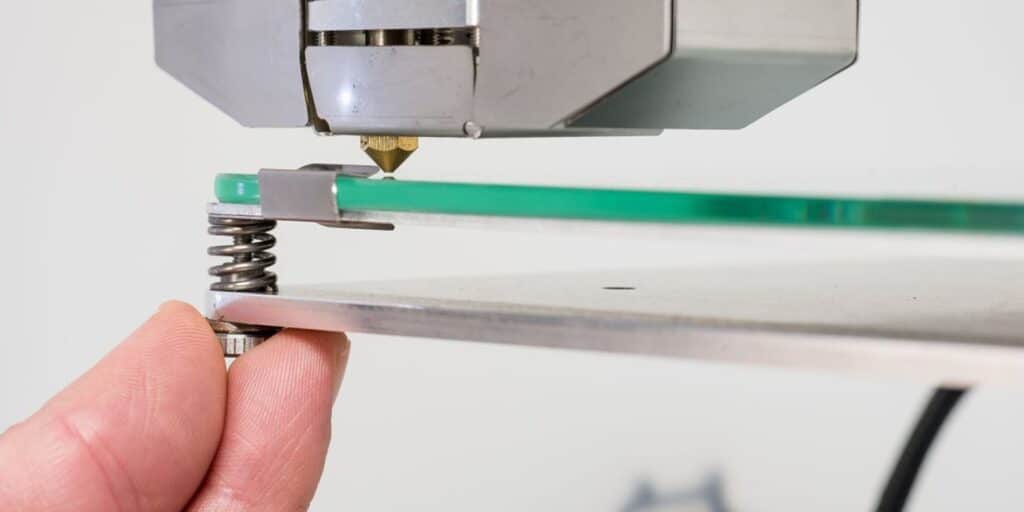
- Bed Leveling and Nozzle Adjustment: Ensuring the print bed is level and the nozzle height is correctly set can help prevent over-compression of the first layer, which is often a cause of the elephant foot.
- Bed Temperature Adjustment: A lower bed temperature can help the first layer to solidify more quickly, reducing the chances of an elephant foot. This adjustment, although simple, can significantly impact the quality of the print.
- Using a Raft: A raft can absorb the outward spread of the first layer, thus mitigating the elephant foot effect. This additional structure can be easily removed post-printing.
- Chamfering the Model: Adding chamfers to the model in the slicing software can help compensate for the outward spread of the first layer.
- Adjusting First Layer Settings: Modifying slicer settings related to the first layer, such as reducing the first layer speed or adjusting the first layer height, can also be beneficial in preventing the elephant foot.
These strategies, along with careful observation and tweaking, can help overcome the elephant foot issue, leading to aesthetically pleasing and functionally accurate prints.
This section of the article has introduced the elephant foot issue, explored its causes, and begun discussing strategies to combat it. It also contains internal links to “Perfecting the First Layer of Your 3D Prints” for further reading and understanding of the importance of a well-formed first layer in 3D printing. The journey from understanding to mitigation is crucial for anyone keen on perfecting their 3D printing skills, and as we delve deeper into implementing these solutions in the following sections, a clearer path to flawless 3D prints unfolds.
Implementing the Solutions

Fixing the elephant foot is a systematic process that requires a blend of technical understanding and practical adjustments. Here, we dive into a step-by-step approach to implementing the solutions discussed in the previous section.
- Bed Leveling and Nozzle Adjustment:
- Start with a clean and level print bed.
- Adjust the nozzle height to ensure it’s at the correct distance from the print bed.
- A well-leveled bed and correctly adjusted nozzle will ensure the first layer adheres well without being overly compressed.
- Bed Temperature Adjustment:
- Begin by reducing the bed temperature slightly and observe the effect on the first layer.
- Adjust the temperature incrementally until the desired result is achieved.
- Using a Raft:
- Enable the raft option in your slicing software.
- A raft provides a buffer that can absorb the elephant foot effect, making achieving a clean, sharp edge on the first layer of your print easier.
- Chamfering the Model:
- Use your slicing software to add chamfers to the bottom edges of your model.
- Chamfering can help compensate for the elephant foot effect, leading to a cleaner first layer.
- Adjusting First Layer Settings:
- Tweak the first layer settings in your slicing software, such as reducing the first layer speed or adjusting the first layer height.
- Experiment with different settings to find what works best for your printer and filament type.
Implementing these solutions might require a few attempts, but the effort will be well worth it when you achieve that perfect first layer.
Summary Table
| Step | Action | Benefit |
|---|---|---|
| Bed Leveling | Adjust nozzle height, level the print bed | Prevents over-compression of the first layer |
| Temperature Adjustment | Lower bed temperature | Helps the first layer solidify faster |
| Using a Raft | Enable raft option in slicing software | Absorbs the elephant foot effect |
| Chamfering the Model | Add chamfers to the bottom edges of the model | Compensates for the elephant foot effect |
| Adjusting First Layer Settings | Tweak first layer speed, adjust first layer height | Tailors the first layer printing to your setup |
Real-world Scenarios

The theory is well and good, but real-world scenarios provide the practical insight needed to truly grasp the nature of the elephant foot issue. Here, we will share experiences from the community, showing how the previously discussed solutions have been applied in practical scenarios.
- Case Study 1: A hobbyist faced with an elephant foot issue managed to eliminate it by adjusting the bed temperature and adding a raft, thus achieving cleaner prints for his miniature models.
- Case Study 2: A professional 3D print designer tackled the elephant foot in a large print by chamfering the model and tweaking the first layer settings, significantly improving the print quality.
These real-world scenarios underscore the practicality of the solutions discussed and demonstrate that overcoming the elephant foot issue is well within reach with a little patience and tweaking.
Frequently Asked Questions
- How can I prevent elephant foot in future prints?
- Regular bed leveling, correct nozzle height adjustment, and bed temperature management are key preventative measures.
- Is it necessary to use a raft to combat elephant foot?
- While not necessary, a raft can be a helpful tool in mitigating the elephant foot, especially for beginners.
- How does chamfering the model help?
- Chamfering helps by compensating for the outward spread of the first layer, thus reducing the elephant foot effect.
We aim to provide a well-rounded understanding by addressing these FAQs, aiding you in your quest for the perfect print.
This section delves deeper into implementing the solutions and discusses real-world scenarios to provide a comprehensive understanding of tackling the elephant foot issue. With practical insights and a focus on actionable steps, the journey towards mastering the art of 3D printing continues.
Conclusion
The journey through understanding, diagnosing, and tackling the elephant foot issue in 3D printing is a testament to this technology’s iterative and problem-solving nature. Each challenge presented an opportunity for learning and fine-tuning, leading to an eventual mastery of the craft. The elephant foot issue, while minor, serves as a stepping stone towards achieving perfection in 3D prints.
By embracing the solutions discussed—bed leveling, temperature adjustments, using a raft, chamfering the model, and tweaking the first layer settings—one can significantly improve the quality of 3D prints. The community-shared real-world scenarios further validate the effectiveness of these solutions, encouraging a collaborative approach to overcoming common 3D printing hurdles.
Summary Table
| Key Takeaways | Action Steps | Community Insights |
|---|---|---|
| Understanding Elephant Foot | Recognize the causes, diagnose the issue | Sharing experiences fosters community learning |
| Implementing Solutions | Apply corrective measures, iterate | Practical application leads to mastery |
| Community Collaboration | Share insights, learn from others | Collective problem-solving enriches the 3D printing experience |
Engage with the Community
In the comments section below, we invite you to share your experiences, challenges, and solutions in combating the elephant foot issue. Your insights could be the beacon of guidance for someone facing a similar challenge, fostering a collaborative and supportive 3D printing community.
Further Reading
For those keen on delving deeper into perfecting their 3D printing skills, we recommend reading our comprehensive guide on Perfecting the First Layer of Your 3D Prints, which explores many first-layer issues and solutions.
The expedition from encountering the elephant foot issue to mastering the solutions unveils the essence of 3D printing—it’s more than just creating objects; it’s about honing a skill, problem-solving, and being part of a community that shares, learns, and grows together. As you continue your 3D printing journey, may each layer laid down be a step closer to perfection.
This concludes the outline for the blog post on tackling the elephant foot issue in 3D printing. The structure provided aims to offer a balanced blend of information, practical solutions, and community engagement, all geared toward enhancing the 3D printing experience. Including internal links directs readers to further valuable resources within your website, enriching their learning journey.


