PrusaSlicer fuzzy skin creates a rough exterior surface for 3D prints. Learn how it functions, when to use it, and what settings affect it!
Every 3D slicer has options that users can use to customize how a 3D model should be translated into G-code and printed on their particular printer. While most slicers offer fundamental 3D printing settings (such as layer height, infill density, and print speed), some sophisticated programs have more intricate features. These unique features are abundant in the open-source 3D slicer program PrusaSlicer for FDM printers.
The “Fuzzy Skin” setting on the PrusaSlicer is one of these unique options, and it produces a rough surface texture on a part’s exterior surfaces. Structures that need a strong grip on another surface and generate a lot of friction are frequently printed using this setting. Of course, many users also use this setting because it’s stylish, and some have even discovered that it works well for concealing other flaws.
This article will discuss the fuzzy skin setting in PrusaSlicer, but most of the information is transferable to other slicers with comparable features. We’ll go over how this slicing feature operates before describing how to use PrusaSlicer’s various fuzzy skin settings.
How It Works

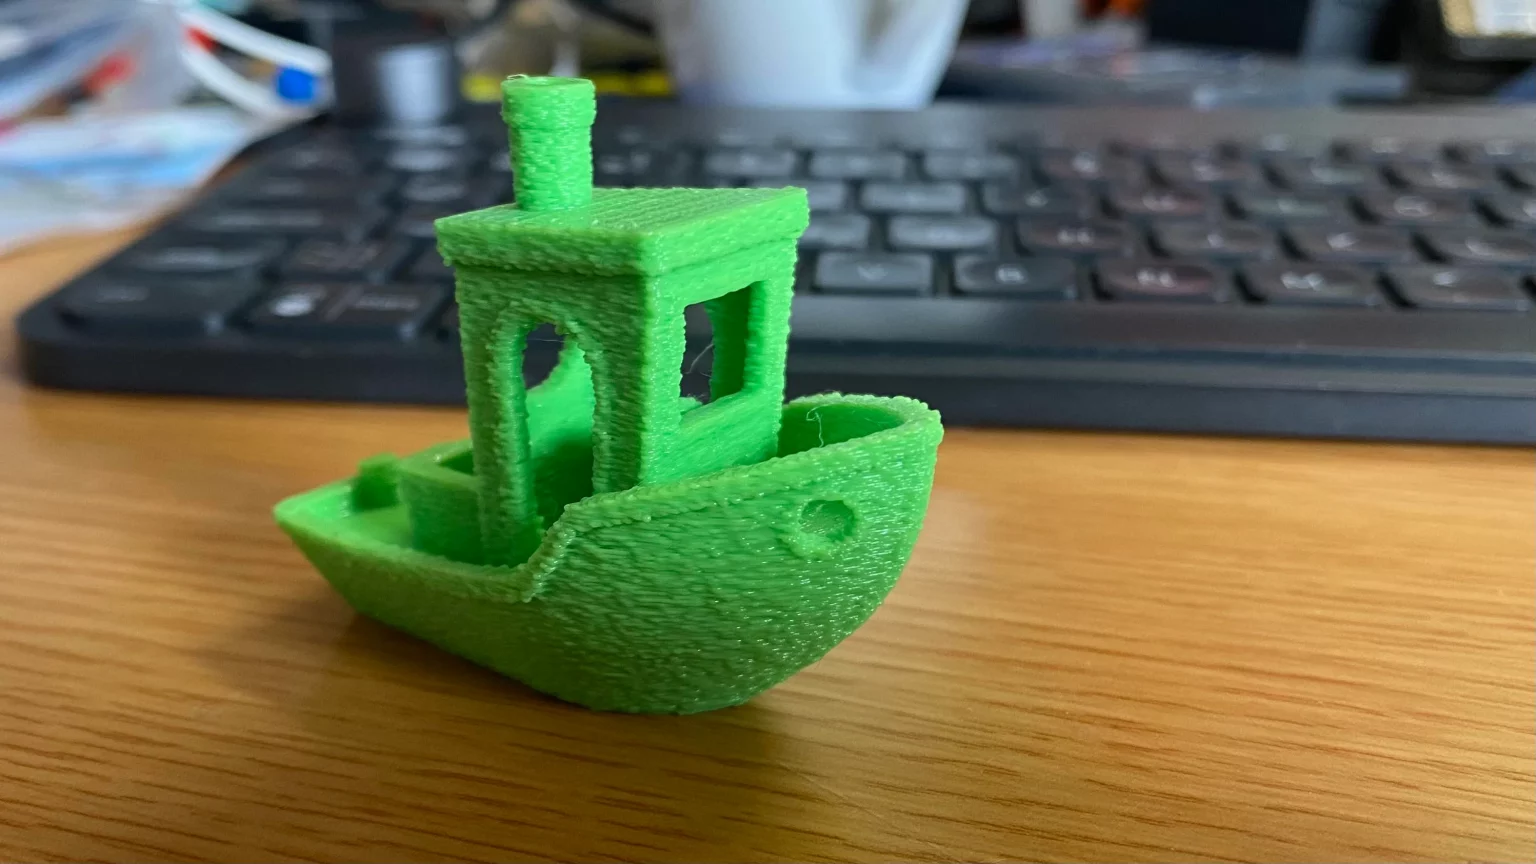
As shown in the image above, the fuzzy skin in PrusaSlicer produces exterior walls with a rough surface texture. The slicer accomplishes this by instructing your printer to move the nozzle back and forth while printing outer walls.
The outcome is an uneven texture, resembling the appearance of a print if the nozzle had accidentally vibrated. The shaky motion of the printer is entirely under control, though. The texture appears to be a printing artifact due to the seemingly random placement of the nozzle jitter points.
The fuzzy skin PrusaSlicer setting produces fuzzy skin only on the sides of prints, not the top and bottom. The part would be incredibly fragile if the entire model were printed with a wobbling nozzle, which is why fuzzy skin only appears on the outer walls.
It’s great that the print time doesn’t change much, even though printing on fuzzy skin requires more movement from your printer. When printing the fuzzy skin, the printer, specifically the motors, may make more noise due to the quick changes in the direction. The stepper motor drivers in your machine may also play a role in whether or not it is noticeably louder, despite user claims to the contrary.
How to Use It
Now that you know how this feature operates let’s move on to the various settings.
You’ll find Fuzzy skin settings in Print settings > Layers and perimeters.
Fuzzy skin type

You can decide whether to apply Fuzzy skin to all or external perimeters.
Fuzzy skin type set to External perimeters (left), All perimeters (right)
Fuzzy skin thickness

The maximum offset (in both directions) for each skin point is measured perpendicular to the boundary wall.
Fuzzy skin thickness 0.1 mm (left), 0.3 mm (right)
Fuzzy skin point distance
Inserting Fuzzy skin points will cause perimeters to be divided into several sections. The number of randomly offset points on the perimeter wall will increase as the fuzzy skin point distance decreases.
Fuzzy skin point distance 0.5 mm (left), 1.0 mm (right)
Fuzzy skin modifier

Only a portion of your model can have fuzzy skin by using modifiers.
- Add a modifier by right-clicking a model. – [Select modifier type].
- Place the modifier so that it touches your model.
- “Add settings > Fuzzy Skin” can be selected by right-clicking the modifier.
- The pop-up window will allow you to choose the settings you want to change.
- Fuzzy skin should be changed to External or All Perimeters.
- You may alternatively change different Fuzzy Skin settings.
Was this article helpful?
Let us know in the comments below or on our Facebook page to let us know your ideas, and we would appreciate seeing pictures of your works of art!
All images (Credit: https://help.prusa3d.com/)


