
Are you looking to take your Fusion 360 skills to the next level? Check out these 10 expert tips for Fusion 360. From choosing the right workspace to using the right tools, these tips will help you create better models and work more efficiently.
Fusion 360 is a powerful 3D modeling and design software that professionals and hobbyists use. In this post, we’ll share some expert tips and tricks for getting the most out of Fusion 360. From choosing the proper workspace to using the right modeling technique, these tips will help you work more efficiently and create better models. Whether you’re a beginner or an experienced user, these tips will help you take your Fusion 360 skills to the next level. Let’s get started!
Expert Tips for Fusion 360: Use the right workspace
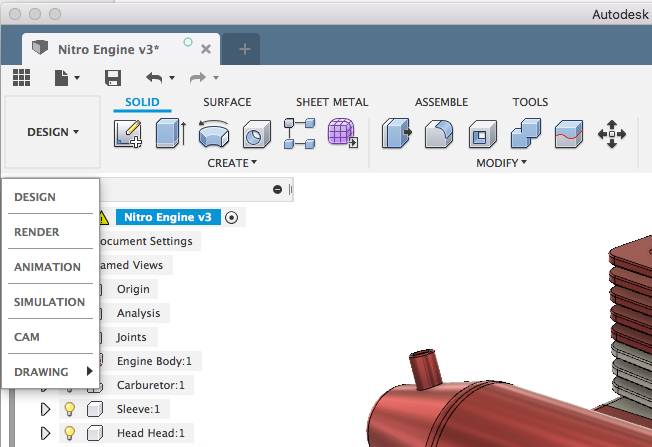
Using the proper workspace in Fusion 360 is essential in getting the most out of the software. Fusion 360 has multiple workspaces designed for different tasks, such as modeling, simulation, and CAM. Each workspace has its own set of tools and features, so it’s important to choose the right one for your project.
For example, if you are working on a 3D model, you should use the modeling workspace. This workspace has a variety of tools and features specifically designed for creating and editing 3D models. It also has a history tree, which allows you to see the history of your model and make changes to previous actions.
On the other hand, if you are working on a simulation, you should use the simulation workspace. This workspace has a variety of tools and features specifically designed for performing simulations on your models. It also has a variety of visualization settings that can help you get a better understanding of your simulation results.
By choosing the right workspace for your project, you’ll be able to access the tools and features you need to get the job done more efficiently.
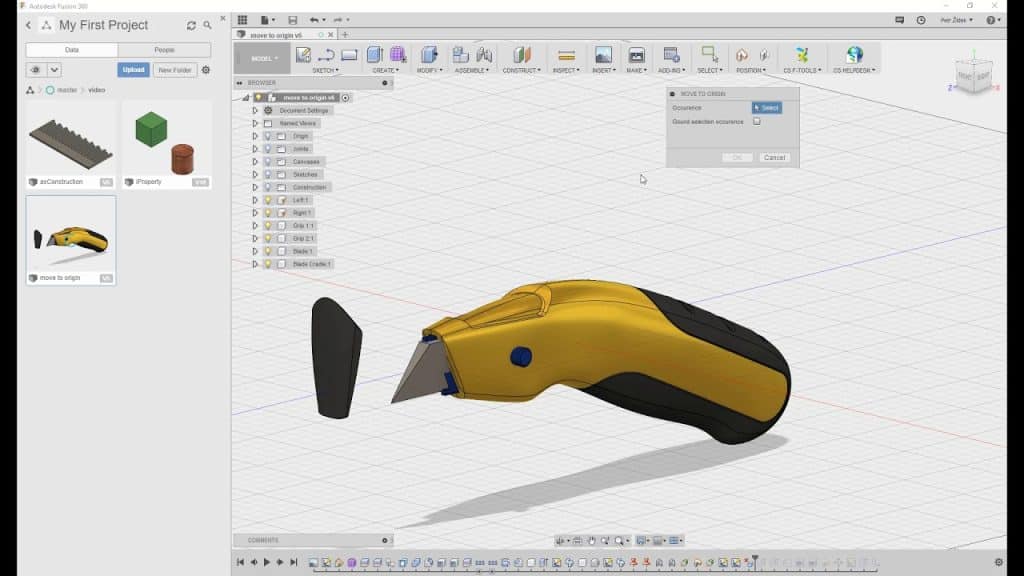
Expert Tips for Fusion 360: Use the history tree
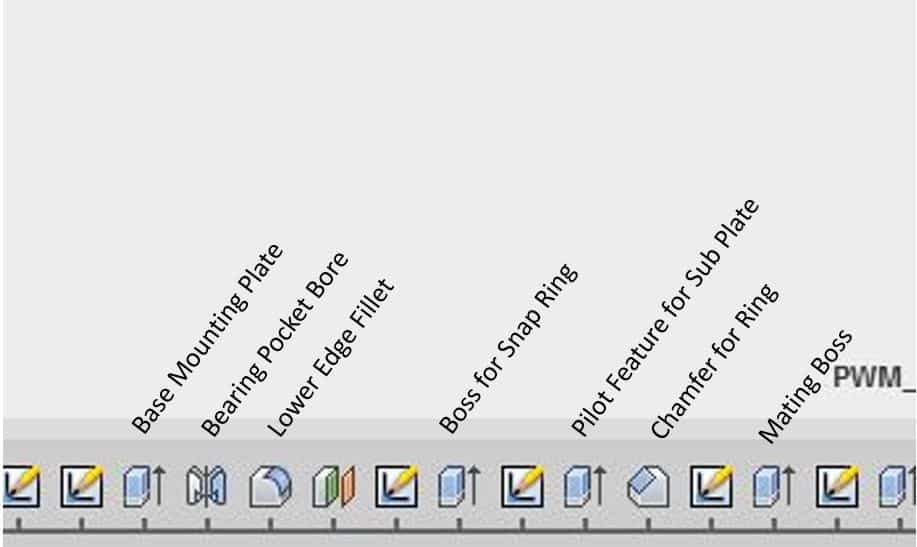
The history tree in Fusion 360 is a feature that allows you to see the history of your model and make changes to previous actions. It’s located on the bottom of the Fusion 360 interface, and displays a list of all the actions you’ve taken in your model. Each action is represented by a node in the tree, and you can expand or collapse each node to see more or less detail.
One of the main benefits of the history tree is that it allows you to make changes to your model without starting from scratch. For example, if you want to change the size of an object you’ve already created, you can simply go to the history tree, find the action where you created the object, and make your changes there. This can save you a lot of time and effort, especially if you’re working on a large or complex model.
Another benefit of the history tree is that it allows you to try out different options and see the results. For example, you can create multiple versions of an object by using the history tree to make different changes to the same action. This can be very helpful for exploring different design options or finding the best solution to a problem.
Overall, the history tree is a powerful and versatile feature in Fusion 360 that can help you work more efficiently and create better models. It’s definitely worth taking the time to learn how to use it effectively.
Expert Tips for Fusion 360: Use the right modeling technique
In Fusion 360, there are several different modeling techniques you can use to create your models. These include solid modeling, surface modeling, and mesh modeling. It’s important to choose the right technique for your project to get the best results.
Solid modeling is a technique that creates 3D models by using solid shapes such as spheres, cones, and cylinders. Solid modeling is often used for creating mechanical parts and assemblies, as it allows for precise control over the geometry of the model.
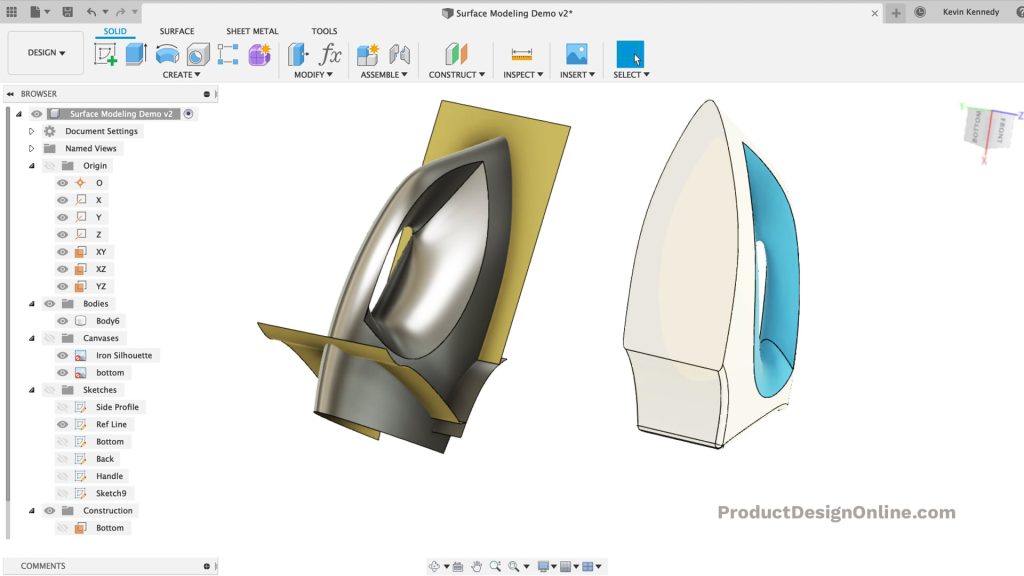
Surface modeling is a technique that creates 3D models using flat surfaces that are connected together. Surface modeling is often used for creating organic shapes and surfaces, as it allows for more flexible and organic forms.
Mesh modeling is a technique that creates 3D models using a network of interconnected vertices and faces. Mesh modeling is often used for creating complex, organic shapes and is popular in the 3D printing and 3D art communities.
Each modeling technique has its own strengths and weaknesses, and the right technique will depend on the type of model you are creating and your own preferences and skills. It’s important to consider the type of model you are creating and choose the technique that will best suit your needs.
Expert Tips for Fusion 360: Use the right units
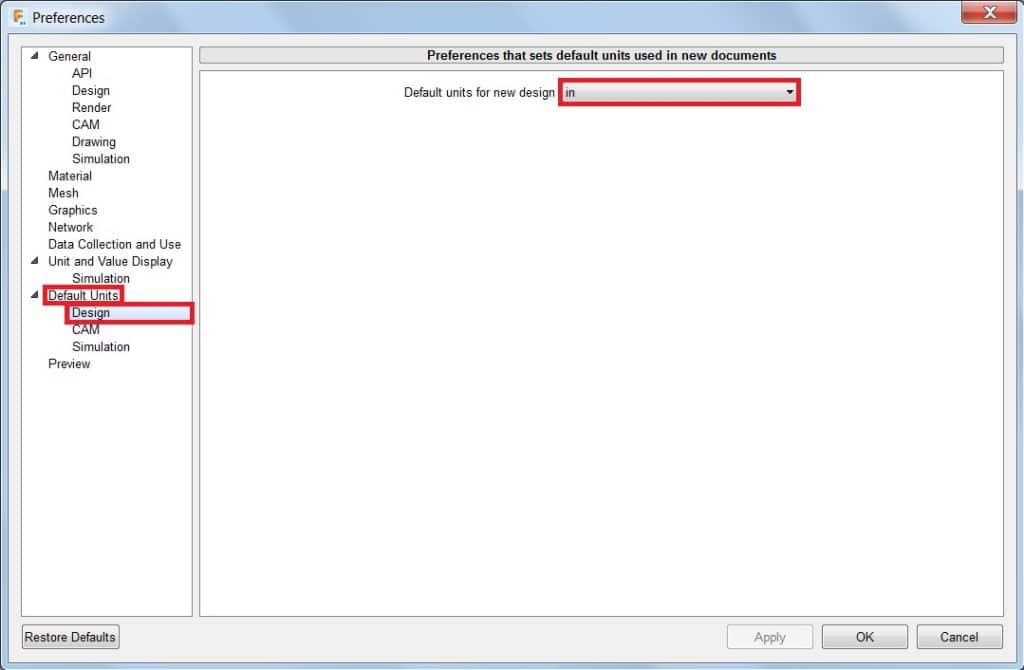
Using the right units in Fusion 360 is important for ensuring that your models are accurate and precise. Fusion 360 allows you to choose between metric and imperial units, so you can choose the units that are most appropriate for your project.
It’s important to set the units correctly at the beginning of your project, as changing the units later on can cause problems with your model. To set the units in Fusion 360, go to the Preferences tab and select Units from the list on the left. From there, you can choose between metric and imperial units and specify the precision of the units.
Using the right units can help you avoid issues with measurements and scaling, and can also make it easier to share your models with others. For example, if you are designing a model for a client in a different country, it’s important to make sure that you are using the same units as them to avoid any misunderstandings.
In summary, using the right units in Fusion 360 is important for ensuring that your models are accurate and precise, and can help you avoid issues with measurements and scaling. Make sure to set the units correctly at the beginning of your project to get the best results.
Expert Tips for Fusion 360: Use shortcuts
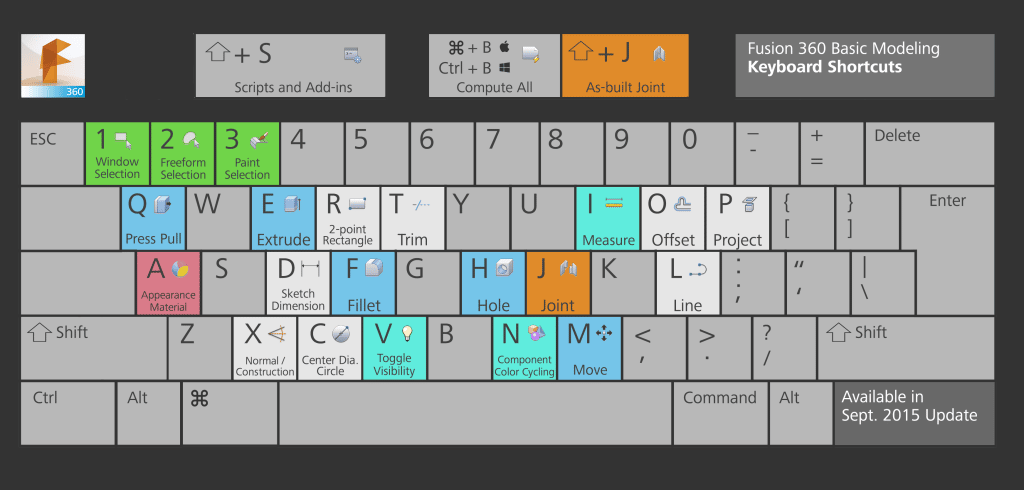
Using shortcuts in Fusion 360 can help you work more efficiently and save time. Shortcuts are keyboard commands that allow you to perform common tasks or access specific features in the software. For example, the spacebar is a common shortcut for panning in Fusion 360, while the W key is used for moving objects.
There are many different shortcuts available in Fusion 360, and they can be customized to suit your needs. To access the shortcut list in Fusion 360, go to the “Help” menu and select “Shortcut List.” This will open a window showing all of the available shortcuts in the software.
Using shortcuts can help you work more efficiently by allowing you to perform tasks without having to navigate through menus or use your mouse. They can also help you avoid repetitive strain injuries by reducing the amount of time you spend using your mouse. If you’re new to Fusion 360, it can be helpful to familiarize yourself with the most commonly used shortcuts to help you work more efficiently. As you become more comfortable with the software, you can customize your own shortcuts to suit your workflow.
Expert Tips for Fusion 360: Use construction lines
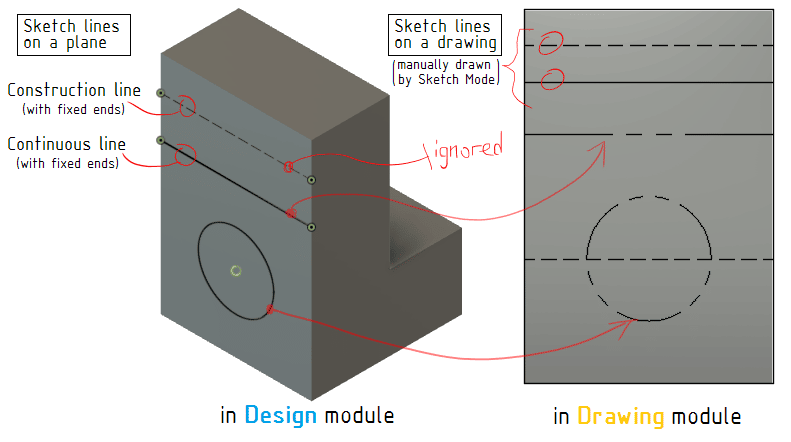
Construction lines in Fusion 360 are lines that are used as reference points for creating other geometry. They can be very useful for creating precise geometry and maintaining design intent. Construction lines can be created by selecting the “Construction Line” tool from the sketch toolbar and clicking and dragging in the canvas.
Once created, construction lines can be used in a variety of ways. For example, you can use them to align other geometry to a specific point or to define the dimensions of a sketch. You can also use construction lines to create complex shapes by using them as reference points for creating arcs, circles, or other geometry.
Construction lines can be very helpful for creating precise geometry, but it’s important to remember that they are not part of the final model. Once you’ve finished sketching, you’ll need to convert your construction lines into solid geometry before you can 3D print or export your model.
Overall, construction lines are a powerful tool in Fusion 360 that can help you create precise, accurate models. They can be especially helpful for creating complex shapes or maintaining design intent in your sketches.
Expert Tips for Fusion 360: Use the right tools for the job
Using the right tools for the job in Fusion 360 is important because it can help you work more efficiently and achieve better results. Fusion 360 has a wide range of tools and features, and choosing the right ones for your project can make a big difference.
For example, if you are creating a solid model, you might use the Extrude, Revolve, and Loft tools to create 3D geometry. If you are creating a surface model, you might use the Boundary Surface, Planar Surface, and Extrude Surface tools. If you are creating a mesh model, you might use the T-Spline and Sculpt tools.
In addition to choosing the right tools for the type of model you are creating, it’s also important to consider your own preferences and skills. Different tools will feel more natural to different users, so it’s important to experiment with different tools and find the ones that work best for you.
Overall, using the right tools for the job in Fusion 360 can help you work more efficiently, achieve better results, and have more fun while 3D modeling.
Expert Tips for Fusion 360: Use the right view
In Fusion 360, the “view” refers to the way that your model is displayed on the screen. There are several different views that you can use in Fusion 360, each with its own unique characteristics.
Wireframe view: This view displays your model as a series of lines and points, showing the underlying geometry of your model. This can be helpful for seeing the relationships between different parts of your model, or for working on the underlying structure of your model.
Shaded view: This view displays your model with a basic level of shading, showing the surface of your model in more detail. This can be helpful for getting a better sense of the overall shape and form of your model.
Rendered view: This view displays your model with realistic lighting and materials, giving you a more realistic representation of what your model will look like when it is printed or manufactured. This can be helpful for visualizing the final appearance of your model.
In Fusion 360, you can switch between different views by using the View menu or by using the keyboard shortcut Ctrl + 1 for wireframe view, Ctrl + 2 for shaded view, and Ctrl + 3 for rendered view. Choosing the right view can be important for different tasks, such as modeling, simulation, or rendering. Experiment with different views to find the one that works best for your project.
Conclusion
In conclusion, Fusion 360 is a powerful and versatile 3D modeling and design software that offers a wide range of tools and features for creating professional-quality models. By following the expert tips and tricks outlined in this post, you can take your Fusion 360 skills to the next level and create even better models.
From choosing the right workspace to using the right modeling technique, these tips will help you work more efficiently and create models that are more accurate and realistic. By using the history tree, sketch constraints, and construction lines, you can create precise geometry and maintain design intent. And by using the right tools and visualization settings, you can create models that look and function exactly how you want them to.
Overall, Fusion 360 is a valuable tool for anyone looking to create professional-quality 3D models. Whether you’re a beginner or an experienced user, these tips will help you get the most out of Fusion 360 and create better models. So, we hope these tips will help you create better models in Fusion 360.
If you have another expert tip for Fusion 360,
Let us know in the comments below or on our Facebook page to let us know your ideas, and we would appreciate seeing pictures of your works of art!


